NEW TUTORIAL: AUTUMN BREEZES

Color Pallette:
Foreground: f8e6d1
Background: ab2d2e
Materials: SUPPLIES
-Mask Damier
-Narah Mask 0838
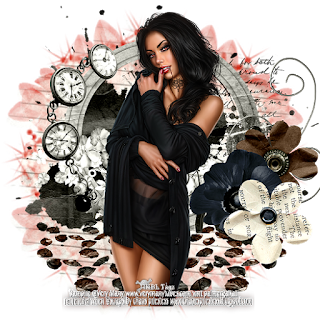
-A poser of your choosing
(I used a verymany tube
which requires a license)
-A mist of your choosing
(I used Athe-Py20)
a decorative element of
your choosing.
Filters:
Ap Lines (silverlining)
Toadies
Tramages
Itallian Editors
You can either put the masks in the masks folder of your PSP or open them and minimize in PSP.
You can choose colors in your color palette that match your tubes or use mne.
Let's Make a Tag:
1. Open a new transparent canvas 1000 x 624
2. flood fill with your background color
3. Layer - New raster layer and paint with your foreground color.
4. Load/apply Mask damier

5. layer merge group
6. Effecet -edge effects - enhance - layer Duplicate
7. on the top layer - With your magic wand tool click in the light colored middle boxes
8. effects - AP (line) - Silverlining - Dotty Grid

9. Selections - select none
10. staying on the same layer -With your magic wand click in the top left dark middle square.
11. open your mist and paste as a new layer. Find a nice piece to fit into the square and then click selections - invert and click delete
12. copy this layer and move it into the other dark middle square. Layer merge down 2x
13. on the middle layer
Effects - Toadies - Blast em

14. On the bottom layer
Effects - Tramages - Tow the Line (default)

15. On the top layer
Effects - 3d Effects - Drop Shadow

16. Layer - new raster layer
17. Fill with white
18. Load mask/Apply Narah Mask 0838

19. Layer merge group
20. Effects - edge effects enhance\
21. slide this down to the bottom
22. Duplicate
23. Image Flip
24 - Image mirror
25. merge down and drop opacity to 80
26. on the layer below add an accent to the light colored squares of your choosing
27. Layers merge all flatten
28. Add borders:
1px dark
1px light
1px dark
29. Edit- Copy
30. select all
31. add border
40px light color
32. selections invert
33. effects - itallian editors - picture in a picture

34. apply drop shadow as before
35. selections - select none
36. Add your tube poser now
37. Apply a drop shadow to the poser
38. Add border 2px dark color
Yay look what you made?
Resize as you like, add your signature
Feel free to share!!!!


Comments
Post a Comment