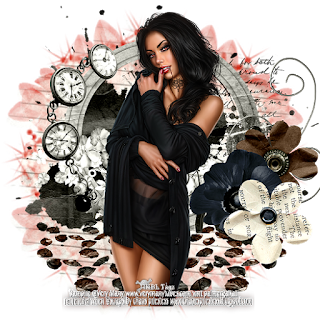
***New Tutorial*** APPRECIATE

APPRECIATE
Hi all! It's been awhile since I wrote a tut and tonight I was in the mood. Yay muse!!!!!
background tube
lecke selection 86
you can find her tuts and more here: https://malackaoldala.weebly.com/
appreciate mask
Flower
you can find more tuts and supplies at Horseplay's Pature Designs
Poser of your own choicce (I used a PTU so it is not included)
Palette:
Foreground #dd5c5a
Background d4bf80
Filters:
Mendi - Weaver
Zero - Fritillary
Mura Meister - Perspective Tiling
Open the tubes and the mask, Ctrl+ D to copy and close the originals. Put the selection in you PSP selections folder.
THE LESSON:
1. Open a new image 1000x624
2. Selections - Select All
3. Copy the background tube amd Paste into Selection Adjust radial Blur

4. Selections - Select None
5. Layer - Duplicate
6. Effects - Mendi - Weaver

7. Set this layer to (Burn)
8. Merge Down
9. Layers - New Raster Layer
10. Selections - Load/Save Selection - 86 Lecke1

11. Fill the selection with the foreground color
12. Effects - 3D effects - Drop Shadow

13. Select None
14. Effects - Texture Effects - Mosaic Glass
15. Effects - Edge Effects - Enhance More
16. Effects - Mendi - Weaver (same as before)

17. Layer Duplicate
18. Image Flip
19. Slide a 1/2 of the way to the right
20. Layer - Duplicate
21. Image - Flip
22. Slide a third of the way to the right
23. Merge Down 2 times
24. Custome Selection Tool with the following settings:

25. Layer - New Raster Layer
26. Fill the selection with the Background Color
27. Effeccts - 3D Effects - Chisel

28. Paste the flower tube into the selection
29. Effects - Zero - Fritillary

30. Selections - Select None
31. Go to the bottom layer and Duplicate Layer
32. Effects - Mura Meister - Perspective tiling

33. You can add a drop shadow to this layer if you choose
33. Go back to the flower layer and duplicate it 3 times
a. resize one layer 605
b. resize one layer 30%
c. resize one layer at 60% and 80%
slide these to the left and place as you wish depending on the size of your chosen poser
34. Go to the last layer and add anew raster layer.
35. Fill this raster with your Foreground color
36. Layer - New Mask Layer from Image and find appreciate
37. Add Borders
1 px - background
10 px foreground
1 px background
38. Select all
39. Add Border 40px White
40. Effects 3D Effects - Drop Shadow 0,0,50,20 background color
41. You can now add your poser as you wish and hit it with the same drop shadow.
42. Add Border 1 px background
Sign it and resize it. if you use a PTU tube, please be sure to use the proper licensing for the tube.
AND YOU ARE DONE! CONGRATS
I HOPE YOU ENJOYED THIS TUTORIAL
AS ALWAYS FEEL FREE TO EMAIL ME YOUR RESULTS


Comments
Post a Comment